Your Nintendo Switch sits on the edge of your desk, battery drained after a long gaming session. You reach for your dock, that simple piece of plastic that’s become essential to your gaming life. But here’s the thing: most gamers don’t fully understand what their dock is doing or how to get the most out of it. The Nintendo Switch charging dock isn’t just a convenient stand: it’s a critical component that affects your console’s longevity, your charging speed, and your overall gaming experience. Whether you’re docking your console between play sessions or setting up a permanent gaming station, knowing how to properly use and maintain your dock can save you headaches, and money, down the road. This guide covers everything you need to know about Nintendo Switch docks in 2026, from official models to third-party alternatives, setup best practices, and troubleshooting tips that’ll keep your console charged and ready to go.
Key Takeaways
- A Nintendo Switch charging dock prevents wear on your console’s USB-C port and enables seamless TV mode transitions, making it essential for protecting your hardware and gaming experience.
- The OLED dock’s built-in LAN adapter provides wired Ethernet connectivity for reduced lag in competitive online games, benefiting even non-OLED console owners struggling with Wi-Fi reliability.
- Dock setup mistakes like forcing your console in, blocking ventilation, or using incompatible chargers can cause charging failures and hardware damage—always use certified 39W adapters and ensure proper airflow.
- Cleaning the USB-C connector with a soft cotton swab solves approximately 50% of charging issues, making it the first troubleshooting step before assuming your dock is faulty.
- Avoid leaving your Switch docked 24/7 and charge between 20–30% battery remaining to extend lithium-ion battery lifespan, as continuous full-charge states degrade capacity over time.
- Third-party docks from established brands like Nyxi, Skull & Co., and Hori offer portability and enhanced features, but always verify user reviews for your specific console model to ensure safety and compatibility.
What Is A Nintendo Switch Charging Dock And Why You Need One
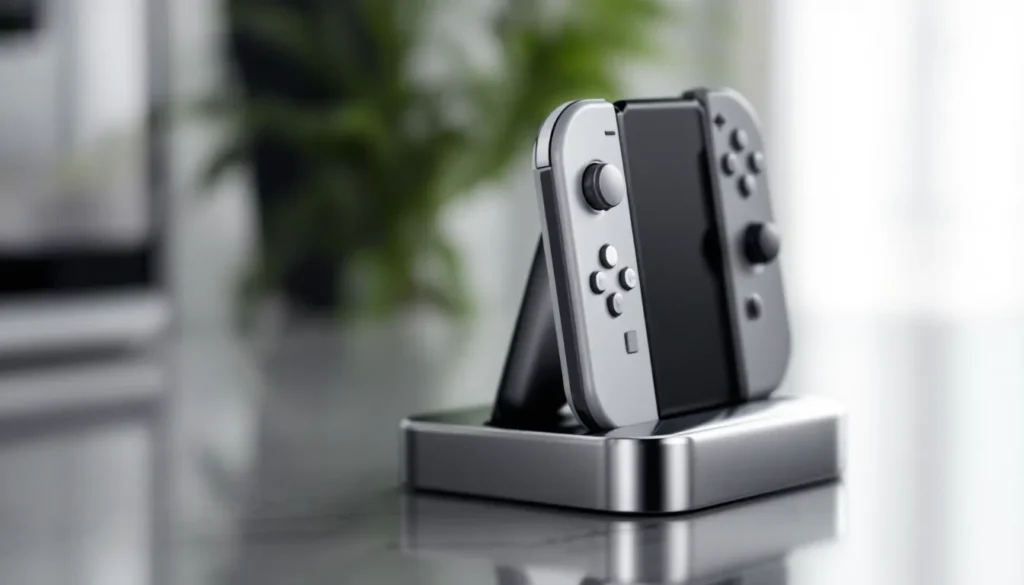
A Nintendo Switch charging dock is a docking station that serves two primary functions: charging your console and displaying it on your TV. Unlike a simple USB charger, the dock handles the AC-to-DC power conversion and includes HDMI output, allowing you to seamlessly switch from portable to TV mode without disconnecting cables. The dock holds your Switch vertically while delivering power through a proprietary USB-C connector, and it’s designed to keep your console cool during extended gaming sessions.
Why do you actually need one? Simple: convenience and protection. Charging via dock eliminates the wear on your Switch’s USB-C port from constant cable plugging and unplugging. If you’re someone who plays in different modes throughout the day, handheld in the morning, docked at night, a dock becomes indispensable. It also means your console stays in a safe, designated spot, reducing the risk of accidental drops or damage. Beyond that, TV mode is where the Switch truly shines, and the dock makes transitioning into it effortless. You’re not fumbling with cables or adapters: you just slide your console in and play.
Understanding The Official Nintendo Switch Dock
Nintendo makes several official dock models, and understanding the differences matters when you’re considering replacements or upgrades.
Key Features Of The Standard Dock
The original Nintendo Switch dock, the one that comes in the standard console bundle, includes a few essential components: the dock cradle itself, a USB-C AC adapter (39W output), and an HDMI cable. The dock features collapsible supports that accommodate the Switch, Switch Lite, and OLED models (though not all with equal comfort). The internal USB-C connector is robust and specifically designed to handle repeated docking cycles without degradation.
One often-overlooked feature is the ventilation design. The dock has openings on the sides and bottom to allow airflow around the console. This prevents heat buildup during long gaming sessions, which is critical because your Switch’s battery and components degrade faster when exposed to sustained heat. The standard dock supports up to 5V/3A power delivery, which translates to about 15W of charging power, sufficient for maintaining battery during moderate gameplay, though not the fastest possible charge.
OLED Model Dock Differences
When Nintendo released the Switch OLED model in October 2021, they included an updated dock. The OLED dock looks visually similar but has some meaningful differences under the hood. Most importantly, it includes a built-in LAN adapter port, a wired Ethernet connection that’s separate from the Switch itself. This is a game-changer for competitive online gaming or any scenario where Wi-Fi connectivity is unreliable. The OLED dock delivers the same 39W power delivery as the standard dock, but the addition of the LAN port makes it valuable even for non-OLED owners.
Both dock versions are officially compatible with all Switch models, though the OLED dock’s larger cradle makes it more ergonomic for the OLED’s slightly bigger size. If you’re playing online multiplayer games or experiencing lag issues, the OLED dock’s Ethernet capability might justify the upgrade, even if you don’t own an OLED console.
Third-Party Dock Options: Alternatives Worth Considering
The official Nintendo dock works well, but it’s not your only option. Third-party manufacturers have created docks that range from near-identical clones to feature-rich alternatives that arguably outperform Nintendo’s offering.
Popular Third-Party Brands And Their Benefits
Several third-party docks have earned solid reputations among the gaming community. Nyxi, Skull & Co., and Hori make docks that prioritize portability and build quality. The Nyxi Hyperkin dock, for example, is compact enough to travel with and includes USB-A ports for charging accessories. Skull & Co’s dock focuses on premium materials and a modular design, letting you swap out cradles for different Switch models.
For competitive players, docks with built-in LAN adapters (beyond just the OLED dock) are worth considering. Some third-party options provide wired networking without requiring you to own an OLED model, which is useful if your connection is laggy during ranked matches in games like Splatoon 3 or Mario Kart 8 Deluxe. Reviews on platforms like Nintendo Life regularly compare these options with detailed performance metrics.
Portable docks deserve special mention. Models like the Tomtoc Portable Dock sacrifice some stability for the ability to carry your full docking setup in a backpack. If you’re traveling or moving between homes frequently, a portable third-party dock can be a legitimate lifesaver.
Safety And Compatibility Concerns
Here’s where you need to be careful. Not all third-party docks are created equal, and a cheap knockoff can damage your Switch. The biggest risk is substandard power delivery, docks that don’t properly regulate voltage can fry your console’s battery or USB-C port. Nintendo’s dock uses certified components and extensive safety testing: many budget third-party options skip these steps.
Compatibility is another consideration. Some third-party docks are designed for specific Switch models and don’t work well with others. A dock optimized for the standard Switch might scratch the OLED model’s screen, or a portable dock’s cradle might be too tight or loose depending on which console you’re using. Before buying, check user reviews specifically for your console model, not just general ratings.
The safest approach is choosing third-party docks from established manufacturers with consistently positive reviews and warranty support. The Verge and other tech publications occasionally review popular third-party gaming accessories, and their assessments can help identify which alternatives are genuinely safe.
Setting Up Your Nintendo Switch Dock Properly
Setting up a dock seems straightforward, but there are right and wrong ways to do it. Incorrect setup can lead to charging issues, overheating, or accidental damage.
Step-By-Step Installation Guide
1. Choose your location. Pick a flat, stable surface with good ventilation. Avoid enclosed spaces like shelves with doors or tight entertainment center corners. Your dock needs airflow on the sides and bottom, think of it like a PC tower that needs breathing room.
2. Connect the AC adapter. Plug the 39W power adapter into a standard outlet. Use a power strip if your wall outlet is difficult to access, but avoid cheap, ungrounded power strips. Quality matters here because voltage fluctuations can affect charging stability.
3. Connect the HDMI cable. Run the included HDMI cable from the dock to your TV’s HDMI port. If your TV supports it, use HDMI 2.0 or higher for the best video quality. Label your HDMI input (most TVs let you rename them) so you know which input to select when docking.
4. Insert your Switch. Gently slide your Switch into the dock, screen-side facing out. The dock’s cradle should support the console without forcing it in. You should hear a soft click as the USB-C connector makes contact, and your Switch’s screen should light up indicating it’s receiving power.
5. Test the connection. Wait a few seconds and confirm your console is charging, you’ll see a small lightning bolt icon in the top-right corner of your Switch’s screen. Try switching to TV mode by pressing the Home button and selecting the TV icon. Your game or home screen should appear on your TV.
Common Setup Mistakes To Avoid
Forcing the console into the dock. The Switch should slide in smoothly. If you’re meeting resistance, the dock might be slightly misaligned or the cradle might be obstructed by debris. Never force it, you risk bending the USB-C connector or cracking the console’s casing.
Blocking ventilation. Don’t place your dock in a corner with walls on both sides or inside a cabinet with a door. Heat buildup is cumulative over hours of gaming, and a blocked dock can cause your Switch to throttle performance or shut down mid-session to protect the battery.
Using an incompatible power adapter. Only use Nintendo’s official 39W USB-C adapter or a certified third-party equivalent rated for at least 5V/3A output. Using a smartphone charger (typically 5V/2A) won’t deliver enough power and will charge very slowly, sometimes slower than your Switch drains battery during gameplay.
Ignoring cable management. Run cables along your entertainment setup’s existing cable routes. Loose cables are a tripping hazard, and a sharp tug on a cable can disconnect your dock or damage the connector. Use cable clips or velcro straps to keep everything tidy.
Troubleshooting Common Charging Issues
Your dock isn’t charging your Switch? Before you panic or assume it’s broken, work through these common culprits.
Why Your Dock May Not Be Charging Properly
Debris in the USB-C connector. Lint, dust, or grime accumulates in the dock’s USB-C port over time. This prevents the connector from making proper contact with your console’s USB-C port, interrupting power delivery. This is the single most common charging problem and the easiest to fix.
Bent or damaged USB-C connector. If you’ve forced your console into the dock repeatedly or accidentally yanked a cable, the internal connector pins might be bent. A bent connector won’t make reliable contact, causing intermittent charging or no charging at all.
Faulty power adapter. The 39W AC adapter can fail, especially if it’s been dropped, crushed, or exposed to heat. If the adapter isn’t delivering power, your dock can’t charge anything.
Console-side USB-C port damage. Sometimes the problem isn’t the dock, it’s your Switch’s USB-C port. Heavy use, repeated docking, or accidental damage can wear out the port, making it unreliable even with a functional dock.
Incompatible third-party dock. If you’re using a third-party dock and it suddenly stops working, it might have a faulty power regulation circuit or a defective USB-C connector. Quality varies significantly between brands.
Effective Solutions And Prevention Tips
Clean the USB-C connector. Unplug your dock and use a soft, dry cotton swab or a small brush to carefully clean the USB-C port on both the dock and your Switch. Be gentle, the connector is delicate. Compressed air works too, but avoid moisture. This solves the problem about 50% of the time.
Try a different dock. If you have access to another dock (official or trusted third-party), test your Switch with it. If it charges fine, your dock is likely faulty. If it still doesn’t charge, the issue is probably your console’s USB-C port, which requires professional repair.
Test the power adapter. Use a multimeter to check if the adapter is outputting correct voltage (around 20V when tested with a compatible meter). If it’s dead or fluctuating, you need a replacement. Alternatively, borrow someone else’s official adapter to test.
Reset your Switch. Hold the power button for 12 seconds to force a hard reset. Sometimes a software glitch prevents proper charging communication between the dock and console. This works occasionally, especially after a system crash.
Inspect for physical damage. Look at your dock’s USB-C connector and your Switch’s USB-C port under good lighting. If you see bent pins, cracks, or corrosion, physical damage is confirmed and likely requires professional service.
Prevention moving forward: Dock your Switch gently, keep your environment clean and dust-free, avoid moving your dock frequently, and use certified power adapters. These habits prevent 90% of dock-related issues. As Digital Trends has noted in various gaming hardware reviews, proper maintenance extends the lifespan of charging equipment significantly.
Maximizing Battery Life And Dock Performance
Your dock isn’t just for charging, it’s part of a larger ecosystem that affects your Switch’s battery longevity and overall performance. Smart habits extend both.
Best Practices For Charging And Storage
Don’t leave your Switch docked 24/7. Lithium-ion batteries (which power your Switch) degrade when held at full charge continuously. If you dock your console overnight every night, you’re slowly degrading battery capacity. A better approach: charge your Switch to 80-90% and then undock it for a few hours, even if you’re not playing. This cycle management keeps your battery healthier longer.
Charge before the battery is completely dead. Letting your Switch drain to 0% regularly damages the battery. Try to dock it when your battery hits 20-30% remaining. This seems counterintuitive, but it’s scientifically proven to extend lithium-ion lifespan.
Keep your dock cool. Charging generates heat, and heat accelerates battery degradation. Use your dock in a well-ventilated space, and if you live somewhere hot, consider a dock with active cooling (a feature some premium third-party docks include). Room temperature between 60-75°F is ideal for both charging and storage.
Avoid gaming while docked during extended play sessions. When your Switch is docked and you’re playing a demanding game like Breath of the Wild 2 or Tears of the Kingdom, the console generates heat from both the GPU load and the charging circuit. Extended sessions in this state stress both your battery and your hardware. If you’re planning to play for hours, consider charging to full first, then undocking and playing in handheld mode.
Maintaining Your Dock For Longevity
Clean your dock monthly. Use a soft, dry microfiber cloth to wipe down the exterior. Every few months, clean the USB-C connector with a cotton swab, as mentioned earlier. Dust buildup reduces cooling efficiency and can eventually affect charging reliability.
Inspect cables regularly. Look for fraying, cracks, or discoloration on your power adapter cable and HDMI cable. If you notice damage, replace the cable before it causes a short circuit or stops working entirely.
Don’t move your dock frequently. Every time you relocate your dock, you stress the power adapter cable and HDMI connections. If you’re moving your dock daily, you’re accelerating wear. Establish a permanent or semi-permanent dock location if possible. If you need portability, invest in a dedicated portable dock instead of constantly moving your main dock around.
Manage cable strain. Use cable organizers to route your dock’s cables smoothly. Tight loops or sharp bends in cables cause internal wire damage over time, leading to connection loss or intermittent power delivery. A quality cable sleeve or management system pays for itself in longevity.
Avoid moisture. Never expose your dock to humidity, spills, or condensation. If your Switch feels damp when you remove it from the dock, allow both to dry completely before use. Moisture corrodes internal connectors and can cause shorts.
Advanced Dock Accessories And Upgrades
Once you understand the basics, you can enhance your dock setup with accessories and upgrade options that improve functionality and convenience.
Portable Docks And On-The-Go Solutions
Portable docks are game-changers for gamers who travel or move between locations. The Hori Compact Dock is Nintendo-licensed and designed for portability without sacrificing build quality. It’s smaller than the standard dock, includes a USB-A port for charging accessories simultaneously, and folds for easy packing. The tradeoff: it’s less stable for casual play and costs more than the standard dock.
The Tomtoc Portable Dock goes further by including a carrying case, cable organizers, and a modular cradle that adjusts for different Switch models. It’s heavier than true portable docks but still travel-friendly. If you’re moving between college dorms, visiting family, or carrying your Switch to tournaments, a portable dock eliminates the hassle of hauling your full standard dock.
Some gamers use a hybrid approach: a portable dock for travel and the standard dock for home. This costs more upfront but gives you flexibility without compromising on home gaming comfort.
Enhanced Docks With Additional Features
Beyond portability, some third-party docks add features Nintendo’s dock doesn’t include. The Skull & Co. Dock offers customizable cradles for different console models, premium build materials, and better cable management. It’s a luxury option that costs significantly more than the standard dock but appeals to collectors and enthusiasts.
Docks with additional USB ports are increasingly popular. These let you charge controllers, headphones, or other accessories while your Switch charges. Look for docks with USB-A 3.0 ports (faster data transfer) rather than older 2.0 standards if you’re transferring data frequently.
For competitive online gamers, docks with integrated WiFi extenders or Ethernet adapters provide a direct connection to your router, eliminating lag in games like Splatoon 3 or Mario Kart 8 Deluxe. While the OLED dock includes Ethernet, third-party alternatives let standard Switch owners achieve the same advantage. This is a legitimate upgrade if online stability is your bottleneck. Checking Ultimate Guide to Streaming can help you understand how network stability affects your overall Switch experience, whether streaming or gaming.
Final consideration: some premium docks include active cooling fans. These are overkill for casual players but worthwhile if you dock your Switch while playing graphically intensive games in a warm environment. The cooling fan reduces heat stress on both your battery and hardware, extending their lifespan. Sound output has improved on modern consoles, and if audio quality matters for your gaming setup, some docks include premium audio passthrough, though this is rare.
When evaluating advanced docks, honestly assess what you actually need versus what’s nice to have. A $40 enhanced dock with Ethernet makes sense if online gaming is your primary activity. A $80 premium dock with customizable cradles makes sense if you own multiple Switch models. But if you’re a casual player with a working standard dock, the official option remains the best value.
Conclusion
Your Nintendo Switch dock is more than a stand and charging station, it’s an investment in your console’s longevity and your gaming experience. The official dock remains the safest choice for most players, offering reliable performance and compatibility across all Switch models. But understanding the ecosystem means you can make informed decisions about third-party alternatives, troubleshooting issues before they become expensive problems, and extending your hardware’s lifespan through smart maintenance habits.
The key takeaway: treat your dock with care, keep it clean, use certified power adapters, and charge strategically. If you’re experiencing charging issues, start with the simple fixes, cleaning the USB-C connector and testing a different adapter, before assuming your dock is dead. And if you’re considering an upgrade, evaluate your actual needs. A competitive player benefits from Ethernet connectivity. A frequent traveler benefits from a portable dock. A casual player benefits from sticking with the official option.
Your Switch can last years with proper care. Dock maintenance is a small part of that equation, but it’s foundational. Set up your dock correctly, use it thoughtfully, and your console will thank you with years of reliable performance. Whether you’re exploring Why Best Buy Is the Best Choice for Your Nintendo Switch Purchase or diving into titles that showcase the Switch’s graphics capabilities like those discussed in Is Nintendo Switch 4K? Exploring Its Graphics and Future Gaming Potential, a properly maintained dock ensures your console is always ready for the next session.