If you’ve recently cracked your Nintendo Switch screen or noticed dead pixels spreading across your display, you’re not alone. The Switch’s portable nature makes it vulnerable to drops, impacts, and daily wear-and-tear that inevitably damage the screen. Whether you’re dealing with a shattered LCD or an OLED display that’s seen better days, knowing how to handle a Nintendo Switch screen replacement can save you hundreds of dollars and get you back to gaming faster than official repair channels. This guide walks you through every option, from Nintendo’s official service to DIY repair, with the technical specifics and real-world advice gamers actually need.
Key Takeaways
- Nintendo Switch screen replacement costs $80–$150 through third-party repair shops or $40–$120 for DIY repair, significantly less than Nintendo’s official $100–$130 service fee.
- Common display issues like cracked LCD panels, dead pixels, and backlight bleeding can affect gameplay, but minor cosmetic damage may not require immediate attention.
- DIY Nintendo Switch screen replacement requires precision tools (Y00 security screwdriver, plastic spudgers, tweezers) and careful handling to avoid damaging internal ribbon cables and components.
- Quality replacement screens vary significantly by source: iFixit and reputable retailers offer OEM or certified panels with warranties, while budget alternatives from Aliexpress risk defects within weeks.
- Protective cases and screen protectors ($5–$15 total) prevent most screen damage and pay for themselves many times over compared to replacement costs.
- After installation, test the display for uniform brightness, touch responsiveness, and proper ribbon cable connections; flickering or unresponsive touch indicates loose cables requiring reassembly.
Understanding Nintendo Switch Screen Issues
Common Display Problems and When Replacement Is Necessary
Nintendo Switch screens fail in predictable ways, and knowing what you’re dealing with helps determine if replacement is truly necessary. Cracked LCD panels are the most obvious culprit, a single impact can spider-web the display or create a black spot that spreads over time. Dead pixels appear as tiny black, white, or colored dots that don’t respond to display changes: a few are cosmetic, but clusters can degrade gameplay. Touch layer delamination (the digitizer separating from the LCD) causes unresponsive input or ghosting, where taps register in wrong locations.
Backlight bleeding shows as uneven brightness, especially noticeable in dark scenes, some users tolerate minor bleeding, but severe cases make gaming uncomfortable. Display flickering or lines running vertically across the screen indicate failing ribbon cables or a degraded LCD panel. On the original LCD model, these issues warrant replacement: on OLED units, backlight bleeding is less common but panel failures follow the same pattern.
If your console still powers on and the issue is purely cosmetic (a few dead pixels), you might live with it. But anything affecting touch input, visibility, or creating safety hazards (sharp glass edges from cracks) demands action. A cracked screen doesn’t heal itself, and continuing to use a damaged display risks spreading damage to internal components.
Original vs. OLED: Which Screen Needs Attention
The original Nintendo Switch LCD uses an IPS panel with a 6.2-inch 1280×720 resolution display. It’s durable but susceptible to backlight issues, dead pixels, and physical damage. Replacement screens for the LCD model are widely available and relatively affordable ($40–$80 for quality panels). The Nintendo Switch OLED introduced a 7-inch AMOLED display with deeper blacks and better color accuracy, a genuine upgrade for handheld play. OLED screens are more expensive to replace ($100–$150) but less prone to backlight bleeding because OLED pixels emit their own light.
Both models use the same basic internal architecture for screen connections, so the removal and installation process is nearly identical. But, OLED screens are more fragile due to thinner construction: they’re also more susceptible to burn-in if static images remain on-screen for extended periods, though this is rare during normal gaming. If you own an original Switch and need a replacement, third-party LCD panels work reliably. OLED replacements should prioritize OEM or certified quality parts, as cheaper knockoffs can develop color shifts or touch sensitivity problems.
Assessing Warranty Coverage and Repair Options
Official Nintendo Service vs. Third-Party Repairs
Nintendo’s official repair service costs roughly $100–$130 for out-of-warranty screen replacement, though pricing varies by region. The process involves shipping your console to a Nintendo Service Center (or dropping it at an authorized retailer in some countries), waiting 5–7 business days, and potentially paying shipping fees both ways. If your Switch is still under the one-year limited warranty and the damage isn’t classified as accidental (Nintendo’s determination, not yours), you might qualify for free repair, but accidental damage almost never qualifies.
Third-party repair shops, both local independent technicians and mail-in services, typically charge $80–$150 for screen replacement with faster turnaround (24–48 hours in many cases). These shops vary wildly in quality. Some are staffed by experienced technicians with proper equipment: others are assembly-line operations cutting corners. Before trusting a third-party, check reviews on Google Maps or Reddit’s r/NintendoSwitch community, ask about their warranty on parts and labor, and verify they use OEM or certified replacement screens.
The DIY route costs $40–$80 for a quality replacement screen plus optional tools (total investment under $120), zero shipping time, and complete control over quality. The trade-off is risk: one wrong move during disassembly can damage ribbon cables, the touch layer, or internal components, potentially creating a $300+ paperweight. If you’re comfortable with electronics, have steady hands, and can follow detailed visual guides, DIY is viable. For most players, the modest cost savings don’t justify the risk, but for tech-savvy gamers who’ve taken apart previous electronics, it’s manageable.
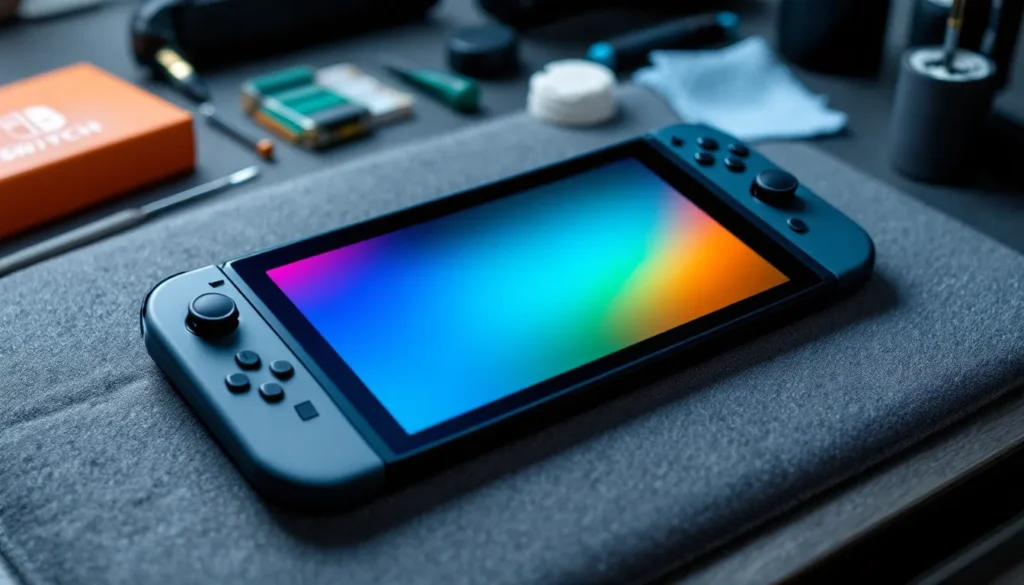
Tools and Materials You’ll Need for DIY Replacement
Essential Equipment and Safety Precautions
DIY Nintendo Switch screen replacement demands precision tools: cheap or improvised alternatives are a fast track to disaster. You’ll need a Y00 security screwdriver (unique to Nintendo’s hardware), a standard Phillips screwdriver (PH00 or PH0), and plastic pry tools or spudgers. Never use metal tools on internal components, they’ll short-circuit ribbon cables and scratch the logic board.
Additional essentials include tweezers for handling delicate ribbon cables, isopropyl alcohol (90%+ concentration) and lint-free cloths for cleaning, and a static wrist strap to prevent electrostatic discharge damage. A heat gun or hair dryer on low setting helps soften adhesives holding the screen bezel, though careful work with plastic tools usually suffices. Anti-static mat or bag placement is critical, work on a non-carpeted surface if possible.
Gambit kits bundled with tools, screens, and adhesives cost $60–$100 and simplify sourcing. But, verify kit reviews first: some bundles include poor-quality screens or incomplete tool sets. Safety precautions: Power off and unplug the Switch before opening. The battery, while small, can pose a fire hazard if punctured, never force components or leverage against the battery compartment. Work in good lighting, take photos before disassembly (reference for reassembly), and move deliberately. Rushing this process guarantees damage.
Where to Source Quality Replacement Screens
Replacement screens vary from counterfeit garbage to OEM quality. iFixit sells verified, tested LCD and OLED screens with lifetime warranties: expect to pay premium prices ($70–$120) but gain reliability. AmazonBasics, while convenient, carries inconsistent quality, read reviews carefully and check return policies before ordering. Aliexpress and eBay offer the cheapest options ($30–$50), but quality is a gamble: you might receive a defective unit or counterfeit panel that fails within weeks.
For OLED replacements, avoid cheap alternatives entirely. OEM OLED panels are manufactured by Samsung SDI and are difficult to counterfeit convincingly, but substandard knock-offs exist. Reputable sellers often list the specific panel manufacturer and part number: if a listing omits this information, skip it. Check seller ratings and return policies, if a third-party seller won’t accept returns on a display failure, they’re admitting they can’t guarantee quality.
Local electronics retailers like Best Buy sometimes stock replacement parts for popular devices, though Nintendo Switch screens are hit-or-miss availability. Calling ahead saves a trip. Gaming-focused retailers or local console repair shops may source screens from trusted suppliers and sell them directly, bypassing shipping delays.
Step-by-Step Guide to Replacing Your Switch Screen
Preparation and Console Disassembly
Start by powering down your Switch completely and letting it cool for 10 minutes. Remove the Joy-Con controllers by sliding the release tabs on the back and disconnecting any attached straps. Place the console on a soft surface, a folded towel or mouse pad prevents sliding and protects the OLED screen (if applicable) from pressing against the work surface.
Locate the Y00 security screw on the back of the console, above the battery label. This single screw holds the internal assembly: it’s intentionally recessed to deter casual opening. Insert the Y00 driver and turn counterclockwise slowly, stripping this screw is a common rookie mistake. Once removed, set it aside in a labeled container (you’ll need five more standard screws shortly).
Using plastic spudgers or a thin metal pry tool (if you must), gently separate the rear plastic casing from the frame, starting at the top edge near the headphone jack. Work around all edges methodically: the plastic clips flex, but forcing them snaps them irreversibly. Once the back casing is free, you’ll see the battery, SSD slot, and ribbon cable connections. Don’t unplug the battery yet, Nintendo’s design allows you to proceed with a live battery if you’re careful. But, removing the battery first is safer: disconnect the small white connector, lift the orange pull-tab, and set the battery aside.
Now locate the five Phillips screws securing the LCD ribbon cable bracket and the touch digitizer cable. Remove them methodically, photos them in place first for reference. Gently disconnect both ribbon cables by lifting the small latch or tab, sliding the ribbon out smoothly. The left and right rail systems are attached separately: remove their screws and slide them outward. You now have access to the front panel.
Removing the Damaged Display and Installing the New Screen
The LCD panel is adhered to the plastic bezel with weak adhesive, designed for serviceability. Using a heat gun on low setting, warm the edges of the screen bezel for 15–20 seconds, focusing on one corner. The adhesive softens, but don’t overheat, excessive heat damages internal components. Insert a plastic spudger gently under the edge and apply steady (not jerky) pressure. The bezel should pop free without the LCD panel itself coming loose.
Once the bezel is off, the LCD panel lifts straight out. Be careful not to bend the panel edges: support it fully as you lift. Disconnect any remaining adhesive residue by gently rubbing it away with isopropyl alcohol and a lint-free cloth. Do not soak the panel or force adhesive removal, aggressive cleaning damages the LCD coating.
Unpack your replacement screen and inspect it for factory defects: dead pixels, cracks, or fogginess. Testing it now saves hours of reassembly work if it’s defective. Position the new LCD panel into the frame, ensuring it’s properly seated and the edges align evenly. Apply new adhesive strips (included in quality kits) along all edges, or use the original adhesive if it’s still intact and clean. Press the bezel back firmly, ensuring even contact across all edges. Allow adhesive to set for 5–10 minutes before reassembly.
Reassembly and Testing Procedures
Reassembly follows disassembly in reverse order. Reconnect the LCD ribbon cable by sliding it into the connector until you feel resistance, then press the latch down. Repeat for the digitizer ribbon cable. Install the rail systems, securing them with their screws. Install the five Phillips screws in the bracket. If you removed the battery, reconnect it now by sliding it into place and connecting the white connector.
Reattach the rear casing by aligning the edges and pressing firmly until all clips snap into place, you should hear small clicks. Install the Y00 security screw and tighten it until snug (don’t over-tighten). Power on the Switch and test the display: look for uniform brightness, responsiveness to touch inputs, and no obvious dead pixels or lines. Launch a familiar game (one you know the visuals of) and play for 5–10 minutes, testing Joy-Con inputs to confirm nothing was disconnected internally.
If the display flickers, shows lines, or doesn’t respond to touch input, power off immediately and inspect your ribbon cable connections, they may not be fully seated. If the display appears dimmer than expected, the backlight might not be fully connected, though this is rare if you didn’t disassemble further than necessary. A completely dead screen after successful reassembly suggests a defective replacement panel: contact your supplier for a warranty claim.
Troubleshooting Post-Replacement Issues
Common Problems After Screen Installation and Solutions
You’ve finished the repair, but your new Nintendo Switch screen replacement isn’t behaving as expected. Flickering or lines usually point to loose ribbon cables, power off, reopen the rear casing, and firmly reseat both the LCD and digitizer connectors. Flickering only during games while menus are stable indicates a power delivery issue: check that the battery connector is fully seated.
Touch input unresponsiveness means the digitizer ribbon cable isn’t connected properly or the screen is defective. Reopen and inspect the digitizer cable connection, it should click firmly into the connector. If it’s confirmed seated and touch still doesn’t work, the replacement screen is defective, and you should pursue a warranty claim with your supplier.
Backlight bleeding (uneven brightness at edges) is common in LCD replacements, especially budget panels. Minor bleeding is cosmetic and won’t worsen. Significant bleeding affecting gameplay should trigger a warranty claim if you purchased from a reputable seller within their return window, typically 30 days. Note that some bleeding is normal in LCDs: judge it against photos of typical bleeding, not against the impossibly perfect OLED displays.
Dead pixels appearing after a few days might indicate a defective panel, though new panels sometimes reveal dead pixels weeks in. If dead pixels appeared immediately, contact the seller. If they appeared gradually and you’re outside the return window, unfortunately most third-party sellers won’t cover this, it’s a gray area legally.
Screen separation or lifting edges means the adhesive isn’t holding. Reopen the console, remove the bezel, and re-apply fresh adhesive strips, ensuring you press firmly around all edges for at least one minute. This usually resolves the issue permanently. For users who purchased from third-party repair shops, return to them if the separation occurred within 30 days of their service, many warranty their adhesive work.
Preventing Future Screen Damage
Best Practices for Console Care and Display Protection
Your new screen is just as vulnerable to damage as the original. Invest in a protective case, hard-shell carrying cases like those from Hori or Satisfye absorb impacts and prevent screen contact with other objects. The case becomes part of your gaming routine, not an afterthought. When traveling or transporting your Switch in a backpack, the case is non-negotiable.
Screen protectors (tempered glass or plastic film) add minimal cost ($5–$15) and prevent minor scratches and dust accumulation. They reduce display clarity slightly, noticeably on OLED models, but the trade-off is worth it for frequent travelers. Apply protectors carefully to avoid air bubbles: rushed installation can damage the touch layer if you press too hard during application.
Handle the console deliberately, avoid one-handed Play mode over hard surfaces, and never leave it on furniture edges where it can be knocked over. Heat is a silent killer: avoid prolonged direct sunlight, don’t leave the Switch in hot cars, and never block the ventilation grills with pillows or blankets during handheld play. Heat degrades LCD and OLED displays over years, accelerating pixel failure.
If you’re how to reset your Nintendo Switch regularly or performing maintenance, use this opportunity to clean the screen carefully. A microfiber cloth and mild isopropyl alcohol (dabbed, not sprayed) removes dust without scratching. Avoid abrasive materials or aggressive rubbing.
For competitive gamers or those with expensive setups, consider extended accidental damage coverage if available from Nintendo (region-dependent) or third-party warranty providers. The cost is modest ($30–$50 annually) relative to screen replacement, and peace of mind has value. Finally, streaming on Nintendo Switch or docking your console prevents unnecessary handheld handling during heavy use, extending overall hardware lifespan. When possible, play on a TV or monitor instead of relying solely on the portable screen.
Conclusion
Nintendo Switch screen replacement is manageable whether you choose official repair, third-party service, or DIY installation. The choice depends on your risk tolerance, budget, and technical confidence. Official Nintendo service guarantees compatibility but trades speed for cost: third-party shops balance convenience with variable quality: DIY work offers savings and control but demands precision and accepts risk.
If you proceed with DIY repair, recognize that success hinges on careful tool selection, methodical disassembly, and quality replacement parts. A $40 screen from a disreputable seller could fail within weeks, negating all cost savings. Conversely, a verified OEM or certified replacement panel installed correctly can last as long as the original hardware.
Regardless of which repair route you take, prevention matters more than cure. A protective case and screen protector cost less than a single replacement screen and eliminate the majority of damage scenarios. Treat your Switch’s display with the same care you’d give any $300 piece of gaming hardware, because that’s what it is.
Your repaired console deserves careful handling going forward. With proper protection and maintenance, your new screen will deliver countless hours of gaming without incident. And when, not if, the next generation of handheld gaming arrives, your revived Switch can be enjoyed or resold rather than recycled.