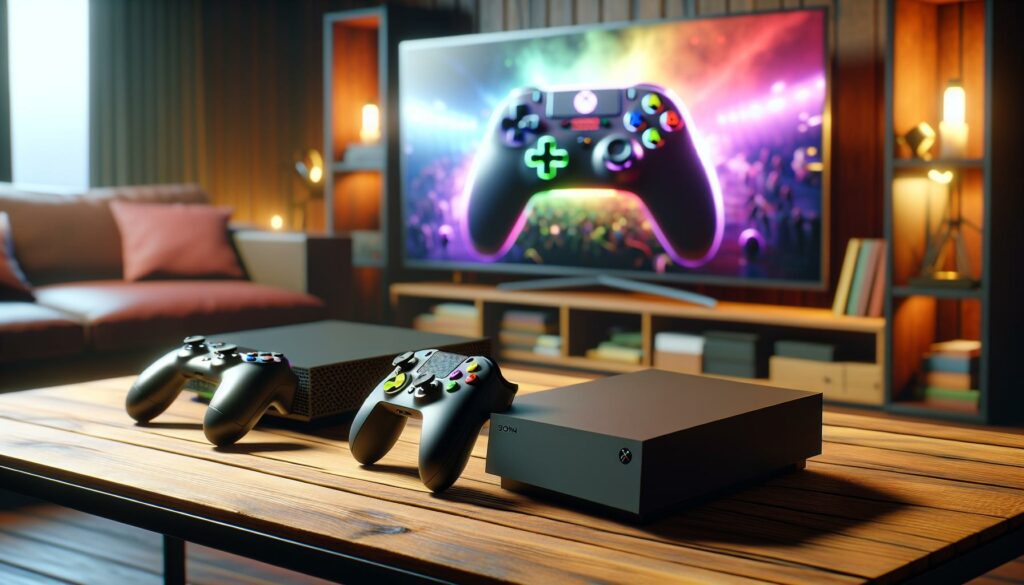

The Nintendo Switch has revolutionized how we play games, whether you’re crushing enemies in Palworld, exploring Zelda dungeons, or streaming your competitive grind to friends. But once you’ve pulled off that clutch moment or discovered a hidden secret, what comes next? Recording your Nintendo Switch gameplay has become essential, whether you’re building a highlight reel, streaming to an audience, or just preserving memories of epic sessions. The good news is that capturing Switch footage has never been more accessible. From the built-in capture button to professional-grade external hardware, your options range from zero-setup convenience to full streaming studio quality. This guide covers everything you need to know about recording Nintendo Switch gameplay in 2026, including native tools, external capture cards, streaming software, and pro tips for different game genres.
Key Takeaways
- The Nintendo Switch’s built-in capture button records the last 30 seconds to 2 minutes of gameplay instantly with no extra hardware required, making it perfect for casual clips and quick saves.
- External capture cards unlock professional-tier recording at 1080p/60fps or 4K quality with access to streaming software like OBS, offering significantly better results than native Switch recording for YouTube and Twitch creators.
- Proper audio quality often determines viewer retention more than video quality—invest in a USB or XLR microphone positioned 6–12 inches from your mouth and use noise gating to eliminate background interference.
- OBS Studio (Open Broadcaster Software) is the free, industry-standard solution for real-time recording and streaming, allowing you to add overlays, alerts, and custom scenes for professional-looking content.
- Optimize video settings to 1080p/30fps for story games and 1080p/60fps for fast-paced action titles, with bitrate between 6000–12000 kbps depending on content type and intended platform.
- Post-production editing with tools like DaVinci Resolve transforms raw Switch footage into compelling content through color correction, audio cleanup, and strategic B-roll placement to maintain viewer engagement.
Built-In Recording Features On The Nintendo Switch
The Nintendo Switch comes equipped with native recording capability that works on all models, standard Switch, Switch OLED, and Switch Lite. You don’t need extra hardware, apps, or subscriptions to get started. This built-in feature is perfect for casual content creation, social sharing, and quick clips.
How To Use The Native Capture Button
Every Joy-Con controller has a Capture Button located on the left controller, just above the D-Pad. Press it once to take a screenshot: hold it down for about three seconds to save a video clip.
By default, holding the Capture Button records the last 30 seconds of gameplay. You can adjust this window in the system settings:
- Navigate to System Settings → Capture/Recording → Video Recording Length
- Options range from 30 seconds up to 2 minutes
- Longer recordings eat more storage, but they give you more flexibility when editing
When you hold the Capture Button, the Switch saves whatever was happening on-screen during that timeframe. Release it, and the clip is automatically saved to internal storage or an inserted microSD card. No rendering wait, no buffer, it’s instant.
Recording Video Clips With The Switch
The magic of the Switch’s capture system is its instant buffer. The console is constantly recording the last 30 seconds (or up to 2 minutes if you’ve adjusted settings) to RAM. This means clutch plays, environmental details, and character moments are already captured before you even think about hitting the button.
To record a clip:
- Play your game normally
- When something worth saving happens, hold the Capture Button (left Joy-Con)
- The status bar appears briefly confirming the save
- Release when ready
- Your clip is saved immediately
You can capture multiple clips back-to-back without any performance hit. The Switch handles this seamlessly across all games. But, remember that supported games for video recording include most first-party and third-party titles, some older indie games or niche titles may have recording restrictions.
Accessing And Managing Your Saved Videos
Once you’ve accumulated clips, here’s where to find them:
- From the Home Screen, select Album (the folder icon on the taskbar)
- Choose Videos to see all recorded gameplay clips
- Scroll through your library and select any clip to watch, trim, or delete
Trimming is built in, so you don’t need external software to cut down unwanted footage. You can adjust both the start and end points of any clip directly in the Album app.
To manage storage efficiently, you can delete old clips or move them to a microSD card. If you’re planning to keep a lot of footage, how to free up space on your Nintendo Switch becomes essential. The internal storage fills up fast once you’re recording regularly, even with the 64GB or 128GB microSD card, active streamers and content creators should monitor their available space monthly.
Sharing clips is straightforward: from the Album, select a clip and choose Post to Social Media. The Switch can upload directly to Twitter/X and other platforms, though quality is compressed for online sharing.
Capturing And Sharing Screenshots
Beyond video, the Capture Button also saves screenshots with a single press. These are perfect for highlighting rare encounters, trophy moments, or documenting glitches.
Screenshots are stored in the same Album app and can be:
- Shared to social platforms directly
- Deleted to free storage
- Used as thumbnail references for video content
The resolution matches your output, 1080p in docked mode, 720p in handheld. For content creators, this is solid for social media thumbnails and highlight reels.
Advanced Recording Techniques Using External Capture Devices
While the built-in capture button is fantastic for quick clips, external capture cards unlock professional-tier quality. If you’re serious about streaming, YouTube content, or competitive play documentation, a capture card is the next logical step.
What Is A Capture Card And Why You Need One
A capture card is a hardware device that intercepts the video and audio signal from your Switch and sends it to a PC or Mac. Unlike the built-in recorder, which saves footage on the console itself, a capture card routes the signal to external software on your computer.
Why invest in one?
- Higher quality: Capture cards can record at 1080p/60fps or 4K (on compatible models), compared to the Switch’s native 1080p/30fps
- Flexibility: Route footage to OBS, Streamlabs, or other software for real-time editing, overlays, and alerts
- Storage: Recordings save to your PC’s drive, not the Switch’s limited storage
- Live streaming: Go live on Twitch, YouTube, or other platforms with professional overlays and chat integration
- Simultaneous capture and gameplay: Recording doesn’t compete with your console’s processing power
Capture cards are essential if you’re building a streaming or YouTube presence. They’re not necessary for casual clips, but they transform production quality dramatically.
Connecting A Capture Card To Your Nintendo Switch
The setup is straightforward but requires a few components:
What you’ll need:
- A capture card (HDMI-in models are most common)
- HDMI cable (Switch to capture card)
- USB cable (capture card to PC/Mac)
- A PC or Mac with USB 3.0+ ports
- A docking station for your Switch (if not using the included dock)
Connection steps:
- Place your Switch in the dock (or compatible dock)
- Connect an HDMI cable from the dock’s HDMI output to the capture card’s HDMI input
- Plug the USB cable from the capture card into your PC/Mac
- Install capture card drivers (if needed)
- Open your streaming/recording software (OBS, Streamlabs, etc.)
- Add the capture card as a video source
- Test video and audio levels
The Switch’s audio comes through the HDMI, so you’ll capture gameplay sound automatically. But, if you want to add voice commentary or clean up audio, you can route it separately through a USB microphone or audio interface.
Both docked mode (1080p/30fps) and handheld mode (lower resolution, capped at 30fps) are supported, though capturing in docked mode yields the best quality. Some newer capture cards also support 4K passthrough if your monitor/TV is 4K-ready, though Switch games don’t output true 4K, the card can upscale for future-proofing.
Popular Capture Card Options For Switch Gaming
Multiple capture cards work well with the Switch. Here are the current standards:
Budget-Friendly (~$50–$100):
- AverMedia Live Gamer Mini: Compact, HDMI-in only, great for beginners. Streams to Twitch/YouTube directly via USB. Limited to 1080p/30fps recording, but solid for casual streamers.
- Elgato HD60 S+: Slightly pricier but reliable. Includes a software suite and supports 1080p/60fps capture on PC. Good middle-ground option.
Mid-Range ($150–$250):
- Elgato 4K60 Pro: Handles 4K passthrough, 1080p/60fps recording. Professional build quality, great for serious content creators.
- AverMedia Live Gamer Bolt: 1080p/120fps capable, low-latency passthrough. Solid for competitive gamers who stream.
Premium ($300+):
- Elgato 4K Pro: Top-tier performance, 4K/60fps passthrough, ultrafast encoding. Overkill for Switch alone, but future-proof if you plan multi-platform streaming.
For most Switch streamers and content creators, the Elgato 4K60 S+ or AverMedia Live Gamer Bolt offer the best value: solid recording quality, fast setup, and reliable software support. The capture card market has matured in 2026, so most models from established brands (Elgato, AverMedia, Blackmagic) offer plug-and-play compatibility.
Consider your content goals. If you’re streaming Smash Bros. or fighting games competitively, 120fps capability on the Bolt is valuable. For single-player story games or casual streaming, 60fps is plenty.
Streaming And Recording Software For Enhanced Quality
A capture card alone doesn’t stream or record, you need software to manage the incoming video feed. This is where streaming platforms and recording applications come into play.
Best Software Solutions For Streaming Platforms
OBS Studio (Open Broadcaster Software) is the industry standard. It’s free, open-source, and runs on Windows, Mac, and Linux. Nearly every content creator uses OBS because it’s incredibly flexible.
With OBS, you can:
- Add multiple video sources (capture card, webcam, game audio)
- Create custom scenes and overlays
- Set up chat displays, alerts, and stream timers
- Record locally or stream live to Twitch, YouTube, or custom RTMP servers
- Adjust bitrate, resolution, and fps on the fly
For Switch streamers, OBS setup is simple: add your capture card as a video source, configure audio (game audio from HDMI + microphone input), and go live.
Streamlabs is a more beginner-friendly alternative. It’s built on OBS but includes a dashboard for alerts, tips, and analytics. Streamlabs has platform integrations for Twitch, YouTube, and Facebook Gaming. If you want a polished interface with less manual tweaking, Streamlabs is worth exploring.
Elgato Stream Deck pairs perfectly with OBS or Streamlabs. This dedicated hardware lets you trigger scenes, mute audio, start/stop recording, and control overlays with physical buttons, no alt-tabbing required.
For pure recording without streaming, DaVinci Resolve (free version) or Adobe Premiere Pro work after the fact. But for real-time control during gameplay, OBS is the workhorse.
If you’re streaming directly through a capture card’s native software (like AverMedia’s bundled app or Elgato’s Stream Manager), those work fine for basic streaming, but they lack the customization OBS provides. Most serious streamers migrate to OBS quickly.
Optimizing Audio And Video Settings For Professional Results
Capture quality depends heavily on configuration. Here’s how to dial it in:
Video Settings:
- Resolution: 1920×1080 (1080p) is the standard for Switch content. It matches the console’s max output and is platform-friendly for YouTube and Twitch.
- Frame Rate: 30fps matches the Switch’s output in most games: 60fps capture is unnecessary and wastes disk space. Set it to match your game’s output.
- Bitrate: For streaming, aim for 6000 kbps (6 Mbps) upload to Twitch/YouTube. For recording, 8000–12000 kbps yields clean, high-quality files.
- Encoder: Use hardware encoding (NVIDIA NVENC or AMD VCE) if your PC has a compatible GPU. It takes load off your CPU, leaving more power for your game.
Audio Settings:
- Game Audio: Capture via HDMI from the capture card. Set this as your primary audio source in OBS.
- Microphone: Add a USB microphone or audio interface for voice commentary. Use a noise gate in OBS to mute background noise when you’re not talking.
- Audio Levels: Peak at -6dB, not 0dB. Headroom prevents clipping and sounds more professional.
- Monitor Mix: If you’re streaming, enable a monitor mix so you can hear yourself and your game audio without delay.
Most capture cards handle HDMI passthrough audio, the Switch’s audio plays through your speakers/headphones and gets routed to your PC simultaneously. This minimizes latency when talking to your audience.
For microphone placement, position it 6–12 inches from your mouth at a slight angle. Avoid USB mics mounted directly to your monitor, they pick up keyboard and controller noise. A desk-mounted boom arm gives you professional positioning and flexibility.
Test your audio levels before streaming. Use OBS’s audio meter and check your broadcast bitrate. If you’re uploading commentary, aim for -12 to -18dB RMS average, loud enough to hear clearly, but not so loud it distorts on low-volume playback.
Troubleshooting Common Recording Issues
Even with solid hardware and software, issues crop up. Here are the most common problems and fixes.
Storage Space And Video Management Problems
Problem: “Not enough storage space” error when recording
The Switch’s internal storage fills up fast. A single 2-minute video clip at max settings uses roughly 500 MB–1 GB depending on the game.
Solution:
- Use a microSD card (Nintendo recommends microSD UHS-I, 64GB or larger)
- Offload older clips to a PC or external drive
- Check System Settings → System → Storage to see what’s consuming space
- Delete screenshots and videos you don’t need
- For content creators who record constantly, a 256GB or 512GB microSD card is wise
Problem: Video files are corrupted or won’t play
This happens if the Switch loses power during recording or if the microSD card fails.
Solution:
- Always ensure your Switch is charged before long recording sessions
- Use a high-speed microSD card (V30 or faster) to reduce corruption risk
- Back up important clips to a PC immediately after recording
- If a clip won’t play, try deleting it and re-recording
Problem: Capture card recordings are massive file sizes
Uncompressed video eats storage. A 1-hour recording at 1080p/60fps can exceed 100 GB.
Solution:
- Use hardware encoding (NVIDIA NVENC, AMD VCE) to compress during capture
- Set OBS bitrate to 8000–12000 kbps for streaming: this yields smaller files than 25000 kbps lossless
- Separate audio and video encoding: record video at moderate bitrate, audio at 320 kbps AAC
- Store recordings on a secondary SSD or external drive, not your OS drive
Audio And Video Sync Issues
Problem: Audio and video are out of sync
This usually happens when using multiple audio sources (game audio + USB mic) without proper buffering.
Solution:
- In OBS, go to Settings → Audio and verify both sources are using the same sample rate (48 kHz)
- Enable Audio Monitoring for your microphone to hear the mix in real-time
- Add a slight delay (50–100 ms) to the USB mic in OBS if it’s leading the video
- Test before streaming: record a 30-second clip, play it back, and check sync
Problem: Video drops or stuttering during capture
Your PC can’t keep up with the incoming feed.
Solution:
- Close background apps (Discord, Chrome with 50 tabs, etc.)
- Lower your recording bitrate or resolution
- Use hardware encoding instead of software encoding
- Check your capture card drivers, outdated drivers cause performance issues
- Monitor CPU/GPU usage in OBS. If either is consistently above 80%, you need to dial back settings
Problem: Captured footage looks washed out or has color issues
Color space mismatch between the Switch, capture card, and software.
Solution:
- In OBS, check your capture card’s Color Space setting. Switch outputs YUV, so match that in OBS
- Adjust Color Range to “Full” if the image looks dim
- Test with different games to isolate whether it’s game-specific
- Update your capture card drivers
Problem: Audio from the Switch is too quiet
The HDMI audio feed may need boosting.
Solution:
- In OBS, click the audio source and adjust the Volume fader (aim for -6dB to -3dB)
- In your capture card’s software, check if there’s an audio gain setting and boost it slightly
- Test with different games, some have quieter audio output than others
- If using a mixer or audio interface, boost the signal there instead
For persistent issues, check forums specific to your capture card. The Switch recording community is active, and most problems have documented fixes on sites like How-To Geek or Reddit’s r/StreamersOnYouTube.
Tips For Recording Different Game Genres
Different game types demand different recording approaches. Here’s how to optimize for various genres.
Capturing Fast-Paced Action And Fighting Games
Games like Smash Bros., Street Fighter 6, Tekken, and roguelikes demand clarity and responsiveness in footage.
Key Settings:
- Frame Rate: Use 60fps if your capture card supports it. Fighting games run at 60fps, and matching this preserves frame-perfect plays.
- Bitrate: Increase to 10,000–12,000 kbps to preserve detail during fast movements and effect-heavy moments.
- Zoom: If recording handheld mode, consider a crop or upscaling to 1080p for visual consistency.
Content Tips:
- Focus on combo sequences and high-execution moments, these are what viewers want to see.
- Record with minimal UI elements if possible (toggles in game settings).
- Capture audio clearly, button clicks and impact sounds add weight to actions. Ensure your audio isn’t drowning in background noise.
- For competitive tournaments or ranked climbs, record long sessions and edit down highlights later using post-production editing tools.
Audio Consideration:
- Fighting game audio is punchy, impacts, announcer callouts, and music are part of the appeal. Don’t compress audio too aggressively: let the dynamics breathe.
Recording Story-Driven And Narrative Games
For games like Zelda: Tears of the Kingdom, Metaphor: ReFantazio, or Persona 5 Tactica, narrative and cinematics are the focus.
Key Settings:
- Frame Rate: 30fps is fine, story games don’t require 60fps.
- Bitrate: 6000–8000 kbps is sufficient. Story game scenes are less busy than action games, so you can lower bitrate without sacrificing quality.
- Resolution: Stick with 1080p. Story game cinematics look sharp at this resolution.
Content Tips:
- Record story moments, character dialogue, and environmental storytelling. These resonate with narrative-focused audiences.
- Capture environmental details, unique locations, hidden areas, and atmospheric moments separate great content from mundane gameplay clips.
- Include reaction audio if appropriate. Commentary on story beats, plot twists, and character development adds personality to footage.
- For long narrative games, consider recording key story beats and stitching them together in editing rather than uploading raw 10-hour streams.
Audio Consideration:
- Story games have dialogue and orchestral scores. Ensure your game audio isn’t compressed to the point of losing nuance. A slightly lower bitrate is acceptable, but audio quality should remain crisp.
For both genres, remember that captured gameplay from the Switch is only as good as the source material. Ensure your Switch is clean, your capture card is properly calibrated, and your PC isn’t struggling. The quality you capture is the quality you’ll deliver to your audience.
Best Practices For High-Quality Switch Gameplay Recordings
Beyond technical settings, professional-level recordings require attention to environment, audio, and post-production.
Lighting And Environmental Considerations
Even the highest-quality video settings won’t save you from poor lighting. Your setup’s visual presentation matters.
Monitor Lighting:
- Use bias lighting (LED strip behind your monitor) to reduce eye strain and improve on-camera appearance if you’re doing face cam or reaction videos.
- Ensure your monitor is at eye level, angled viewing distorts colors and image quality in captured footage.
- Avoid direct sunlight on your monitor: it causes glare and washes out colors.
Room Setup:
- Record in a well-lit space. Daylight is ideal, but if streaming in the evening, invest in a key light (e.g., a 5600K LED panel) positioned 45 degrees to your left or right.
- Eliminate harsh shadows on your face or setup (if relevant for your content).
- Keep your recording space clean and organized in the background. Clutter distresses viewers and looks unprofessional.
Cable Management:
- Run HDMI, USB, and power cables behind your desk or through cable raceways. Visible cable spaghetti looks messy on camera.
- This also reduces tripping hazards during long streaming sessions.
Audio Quality And Microphone Setup
Audio quality often trumps video quality. Bad audio tanks viewership.
Microphone Selection:
- USB Condensers (Audio-Technica AT2020, Blue Yeti): Plug-and-play, affordable ($50–$150), decent for beginners.
- XLR Microphones with a USB Audio Interface (Shure SM7B + Focusrite Scarlett): Professional sound, more investment ($200–$400), but industry standard.
- Boom Arms: Mounting your mic on a boom arm keeps it out of the shot and allows positioning adjustments without moving your body.
Placement & Technique:
- Position the mic 6–12 inches from your mouth.
- Speak clearly and maintain consistent volume. Use a pop filter to reduce plosives (harsh “P” and “B” sounds).
- Test mic levels before recording. Peak at -6dB in OBS.
- Use a noise gate (OBS built-in, or a plugin) to mute background noise when you’re not talking.
Acoustic Treatment:
- You don’t need a full studio, but basic acoustic panels reduce echo and room noise. Hang fabric or foam panels on walls adjacent to your mic.
- Even foam egg crate panels (cheap DIY solution) improve audio by absorbing reflections.
- Avoid recording in bathrooms or empty rooms, they cause reverb. Rooms with furniture, curtains, and carpeting sound better.
Audio Mixing:
- Balance game audio and voice commentary so both are audible. Game audio should sit at -12dB to -18dB RMS, voice at -12dB.
- Use EQ to reduce rumble (80 Hz and below) and harshness (3–5 kHz peak) in voice audio.
- Compress voice slightly (4:1 ratio, -20dB threshold) to keep levels consistent.
Video Editing And Post-Production Workflow
Capture is only the first step. Editing transforms raw footage into compelling content.
Editing Software Options:
- DaVinci Resolve (free version): Professional-grade, color grading, Fusion compositing, Fairlight audio editing. Steep learning curve, but incredibly powerful.
- Adobe Premiere Pro ($55/month): Industry standard, intuitive interface, cloud sync across devices.
- CapCut (free): Beginner-friendly, fast exports, trending effects. Limited for serious creators but excellent for social clips.
Editing Workflow:
- Import & Organize: Drop raw clips into a folder, name them clearly (e.g., “Switch_Smash_Game1_1080p_20260124.mp4”).
- Rough Cut: Assemble the best moments in chronological order, leaving room for transitions.
- Color Correction: Adjust exposure, contrast, and saturation if necessary. DaVinci Resolve excels here.
- Audio Editing: Clean up background noise, sync commentary, adjust levels, add music.
- Transitions & Effects: Keep them minimal. Subtle fades work better than flashy transitions for gaming content.
- Titles & Graphics: Add game info, player names, and on-screen stats where relevant.
- Export: For YouTube, export at 1080p/60fps, H.264 codec, 8–15 Mbps bitrate. For archival, use ProRes if your storage allows.
Pro Tips:
- Cut on action: Transition between clips during intense moments to maintain pacing.
- Use B-roll (replays, zoomed-in details, related game footage) to cover edits or weak moments.
- Add subtle background music (royalty-free sources like Epidemic Sound or Artlist) to improve pacing.
- Include text overlays for important info (kill count, money earned, objectives) without cluttering the screen.
For those looking to streamline content sharing, Nintendo Switch Online members can access some cloud features, though dedicated capture card + editing software yields far superior results for serious creators.
Exporting & Uploading:
- For YouTube: 1080p60, H.264, 10–15 Mbps. Maximum of 128 GB per file.
- For Twitch VODs: Same as YouTube: Twitch re-encodes for different bitrates.
- For Archival: ProRes 422 HQ (larger files, lossless quality, future-proof).
- Always upload on a wired connection to minimize interruptions. Avoid uploading during peak internet hours.
Conclusion
Recording Nintendo Switch gameplay in 2026 offers unprecedented flexibility. Whether you’re hitting the Capture Button for a quick clip of a rare Pokémon encounter, streaming competitive Smash to an audience, or producing polished YouTube content, the tools and knowledge are within reach.
Start with the built-in capture features, they’re genuinely solid for casual content. Once you’re ready to level up, invest in a capture card and external software. The jump from native recording to OBS + capture card is dramatic: you gain bitrate control, live streaming capability, and unlimited storage on your PC.
Remember that quality hinges on three pillars: hardware (capture card, microphone), software (OBS, DaVinci Resolve), and technique (audio levels, lighting, editing skill). You don’t need the most expensive gear, a mid-range capture card ($150–$250), a decent USB mic ($100), and free software like OBS and DaVinci Resolve will produce professional-grade results.
Record often, experiment with settings, and don’t be afraid to iterate. Your first clips won’t be perfect, and that’s fine. Each recording teaches you something about what works. The competitive and casual gaming communities are always hungry for solid Switch content, whether it’s tournament VODs, speedruns, story breakdowns, or just entertaining gameplay with personality.
Now grab that controller, hit record, and show the world what you’re capable of.