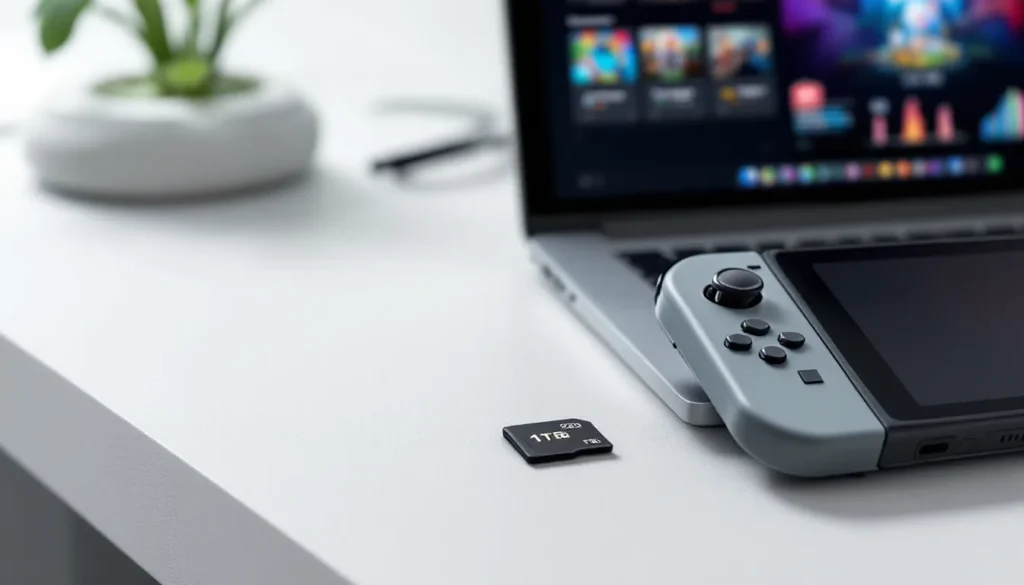
If you’ve owned a Nintendo Switch for more than a few weeks, you’ve probably hit the storage ceiling. The console’s built-in 64GB of storage fills up faster than you’d think, Zelda: Tears of the Kingdom alone consumes around 15GB, and that’s just one game. Forget downloading multiple AAA titles without constantly juggling what to delete. A micro SD card isn’t just a nice-to-have: it’s essential if you’re serious about building a digital library. In 2026, with the average modern Switch game sitting between 5-15GB, understanding which micro SD card works best has become a critical part of owning the system. This guide covers everything you need to know to pick the right card, install it properly, and maximize your Switch’s potential.
Key Takeaways
- A Nintendo Switch micro SD card is essential in 2026 because the console’s 64GB internal storage fills quickly, with modern games consuming 5-15GB each—making external storage critical for building a meaningful digital library.
- Choose a 512GB micro SD card with at least U3 and V30 speed ratings from trusted brands like SanDisk, Samsung, or Kingston for optimal performance and reliability without overspending on unnecessary features.
- Installation is simple: power off your Switch, insert the card into the rear slot with gold contacts facing down, and let the console auto-format it—taking just 30 seconds to complete.
- Manage your storage by categorizing games strategically and deleting titles freely without losing save data, which syncs separately via cloud backup included with Nintendo Switch Online.
- Upgrade to a larger micro SD card when you’re constantly deleting games, the card exceeds 85% capacity, or new game sizes make your current storage insufficient.
- Transferring data between micro SD cards is straightforward using a computer file reader—copy files from the old card to the new one, insert it into your Switch, and your entire library remains intact.
Why You Need a Micro SD Card for Your Nintendo Switch
Let’s be real: the Switch‘s 64GB internal storage is a joke by 2026 standards. That sounds like plenty until you start actually downloading games. The system reserves space for the OS itself, so you’re really working with closer to 50GB. Add a major title or two, and you’ll spend more time managing storage than playing.
Understanding Storage Requirements
The Nintendo Switch uses 64GB of eMMC storage from the factory. After accounting for the operating system, system updates, and save data, you’re looking at approximately 50GB of usable space. A single modern game can consume anywhere from 5GB to over 15GB depending on its complexity and asset size. Games like Baldur’s Gate 3 clock in around 150GB when you’re running the largest builds, but that’s an outlier, most Switch ports range from 8-12GB.
Here’s the math: if you want to maintain just five to ten games on your Switch at any given time without constant uninstalling and reinstalling, you need external storage. Without a micro SD card, you’re essentially limited to playing one or two games before deletion becomes necessary. That’s not a gaming library: that’s playing musical chairs with your digital collection.
Read about How to Free Up Space on Nintendo Switch for temporary solutions, but a micro SD card is the real fix.
Digital vs. Physical Game Storage
Here’s where this gets interesting: whether you buy physical or digital games impacts your storage strategy significantly.
Physical games, cartridges, only require the space needed for save data and updates, which is usually under 5GB even for large titles. If you’re primarily a cartridge buyer, you can get away with a smaller micro SD card (maybe 256GB) and use it mainly for system updates and game patches.
Digital games require full installation to the Switch’s storage. A library of five to ten digital games means you absolutely need 512GB or larger. Digital offers convenience, no swapping cartridges, easy cloud saves, but it demands storage. If you’re a “buy everything digital” person, you’re basically forced to max out a micro SD card.
Most players are hybrid: they buy some physical titles for AAA releases and go digital for smaller indie games and sales. This middle ground typically requires a 256GB to 512GB card depending on how aggressive you want to be with your game hoarding.
What to Look for in a Nintendo Switch Micro SD Card
Not all micro SD cards are created equal. The Switch has specific requirements, and buying the wrong card can mean slow load times, corrupted save files, or total compatibility issues. Here’s what matters.
Storage Capacity: How Much Do You Really Need?
Capacity comes down to your gaming habits. Here’s a practical breakdown:
- 128GB: Entry-level. Works if you’re mostly buying physical cartridges and only need space for patches and save data. Not recommended for heavy digital buyers.
- 256GB: The sweet spot for casual to moderate players. Gives you room for 15-20 indie games or 5-8 AAA titles comfortably.
- 512GB: Ideal for serious collectors. You can load 30-40+ games and barely notice capacity constraints. This is what most competitive and hardcore players should aim for.
- 1TB: Overkill for most people, but prices have dropped significantly in 2026. If you want to “set it and forget it” for the next five years, this eliminates future worries.
The Nintendo Switch officially supports microSDXC cards up to 2TB, though most users won’t ever need that much. A 512GB card handles virtually any real-world use case.
Speed Classes and Read/Write Performance
Speed matters more than you’d think. The Switch reads from micro SD cards for game loading, and a slower card means longer boot times and potential stutters during gameplay, especially noticeable in open-world games.
Look for these specifications:
- UHS-I Speed Class (U3): Minimum write speed of 30MB/s. Adequate but not ideal. Older cards often top out here.
- Video Speed Class (V30): Guaranteed minimum write speed of 30MB/s. Better for sustained performance.
- V60 or V90: Premium options with 60MB/s and 90MB/s minimum write speeds respectively. These are overkill for the Switch, the console’s controller doesn’t take advantage of speeds above V30, but they don’t cost much more in 2026.
What you actually need: Cards with at least U3 and V30 ratings will perform fine. Real-world read speeds on quality cards sit around 100-170MB/s, which is more than sufficient. The Switch’s internal storage speed is relatively slow anyway, so a V30 card with solid read performance (150MB/s+) won’t create noticeable lag.
Ignore marketing BS about “4K-capable” or “extreme speed” cards marketed at action cameras. The Switch doesn’t stress micro SD cards the way GoPros do. Focus on legitimate speed ratings, not marketing fluff.
Reliability and Brand Considerations
You’re storing hundreds of hours of game progress. A card failure is catastrophic. Stick with proven brands:
- SanDisk: Industry standard. Their Extreme and Ultra lines are solid performers for the Switch.
- Samsung: The EVO Select and PRO Plus are reliable workhorses with good pricing.
- Kingston: Canvas series offers excellent value without sacrificing reliability.
- Crucial: Often overlooked but consistently reliable.
Avoid no-name Amazon cards with 10,000 five-star reviews but zero verifiable history. Counterfeit micro SD cards are unfortunately common, particularly on third-party marketplaces. Buy from reputable retailers or directly from manufacturers.
Check for TRIM support and wear-leveling technology in the card’s specs, these extend lifespan and maintain consistent performance. All major brands include these now, but it’s worth verifying for off-brand purchases.
Consider warranty coverage too. SanDisk and Samsung both offer lifetime warranties on their higher-end cards, which provides peace of mind for a device holding thousands of hours of gaming.
Best Micro SD Cards for Nintendo Switch
Based on 2026 market conditions and gaming requirements, here are the top recommendations across different budgets.
Top Picks Across Different Budget Tiers
Best Overall: SanDisk Extreme microSDXC (512GB)
- Speed: U3, V30, read up to 170MB/s
- Price: Around $45-55 for 512GB
- Why: Rock-solid reliability, proven track record on Switch, excellent speed-to-price ratio. This is what most Switch players should buy.
Best Budget Option: Kingston Canvas Go Plus (256GB)
- Speed: U3, V30, read up to 170MB/s
- Price: Around $25-30
- Why: Legitimately solid performance at budget pricing. No compromises on speed ratings, just smaller capacity.
Best Premium Choice: Samsung PRO Plus (512GB)
- Speed: U3, V30, read up to 170MB/s
- Price: Around $50-60
- Why: Slightly faster than the SanDisk and includes more robust wear-leveling. Worth the extra $5-10 for longevity if you’re the type who keeps one card for a decade.
Best Value at Capacity: SanDisk Extreme microSDXC (1TB)
- Speed: U3, V30, read up to 170MB/s
- Price: Around $70-85
- Why: In 2026, 1TB cards from major brands aren’t significantly pricier than 512GB. If you plan to keep your Switch for years and want zero storage stress, this is the play.
Budget-Conscious Pick: Crucial P5 Plus microSDXC (256GB)
- Speed: U3, V30, read up to 165MB/s
- Price: Around $20-25
- Why: Fewer people talk about Crucial, but they deliver. This is the dark horse option if you want reliable performance and hate marketing hype.
Avoid gaming-specific cards marketed with insanely high write speeds (240MB/s+). You’re not recording 4K footage: you’re reading games. The switch doesn’t benefit from premium video specs, and you’re just paying for features you won’t use.
Research by independent hardware reviewers consistently shows that across major brands’ mid-tier options, real-world performance differences are negligible on the Switch. Pick a trusted brand in your budget range, and you’ll be fine.
Performance Comparison: Speed and Durability
Let’s break down what you can actually expect in terms of performance differences:
Real-World Load Times:
Differences between V30 and V60 cards are measured in milliseconds, completely imperceptible during gameplay. A AAA title on a quality V30 card loads in roughly the same time as on a V60 card. The Switch’s CPU and RAM are the bottleneck, not the storage speed.
Sequential Read Performance:
Most quality cards hit 140-170MB/s sequential reads, which matters for large file transfers to your computer but barely affects game performance since games load in smaller, non-sequential chunks.
Durability & Longevity:
High-end Samsung and SanDisk cards include enhanced power-loss protection and better error correction. Practically, this means they’re more likely to survive accidental disconnection during a write operation. It’s not a huge difference for personal use, but it’s worth noting if you’re paranoid about save data corruption.
Random Read/Write Performance:
This is what actually matters for game performance, how fast the card can grab individual files scattered across its surface. Quality V30 cards perform virtually identically here. Premium cards sometimes edge ahead, but real-world usage won’t show a frame rate difference on the Switch.
For the Switch specifically, you’re overthinking performance differences beyond the V30 threshold. Any quality V30 card from a reputable brand performs essentially the same in games.
How to Install and Format a Micro SD Card on Your Nintendo Switch
Installation is straightforward, but there are some best practices to follow to avoid corrupting the card immediately.
Step-by-Step Installation Guide
-
Power off your Switch completely. Don’t just put it in sleep mode. Hold the power button and select “Power Options” > “Turn Off.” This prevents accidental data corruption during insertion.
-
Locate the micro SD slot. It’s on the back of the Switch, beneath the kickstand. You’ll see a small rectangular slot labeled “microSD” (or “MicroSD” depending on revision).
-
Eject the existing card (if any). If you’re upgrading, there’s probably already a card in there. Gently push the card inward until it clicks and springs out. Remove it carefully.
-
Insert the new card. Slide your new micro SD card into the slot with the gold contacts facing downward (toward the console). It should slide in smoothly and click when fully seated. Don’t force it.
-
Power the Switch back on. The system will detect the card automatically. If it recognizes the card, it may ask if you want to format it. If this is a brand-new card, let the Switch format it. This ensures compatibility and sets up the file structure correctly.
-
Verify recognition. Go to System Settings > Data Management > microSD Card Management. The Switch should display your card’s total capacity and free space.
That’s it. Insertion takes about 30 seconds. The Switch handles everything else automatically.
Formatting Best Practices
Formatting erases everything on the card and prepares it for Switch use. Here’s when and how:
First-Time Format:
Let the Switch do it. Don’t pre-format on your computer. The Switch needs to create specific directories and system files. Letting the console handle it ensures proper setup.
Existing Card Swap:
If you’re replacing an old card with a new one and want to transfer data (more on that later), don’t format the new card immediately. Follow the data transfer process first, then format the old card if you want to repurpose it.
Format Method:
If you need to reformat a card already in use:
- Settings > Data Management > microSD Card Management > Format microSD Card
- The Switch will warn you that this erases all data. Confirm only if you’re sure.
Computer Formatting:
Generally avoid formatting on PC or Mac unless troubleshooting specific issues. If you must reformat on computer, use the card manufacturer’s formatting tool or a utility like SD Card Association’s formatter. Windows and Mac don’t always format SD cards in ways the Switch prefers.
Common Issues and Troubleshooting
Card Not Recognized:
- Remove the card, power cycle the console, reinsert. Sounds dumb but fixes 80% of cases.
- Check that contacts are clean and card is fully seated. Dust can prevent proper connection.
- Update system software. Older firmware sometimes has compatibility issues with newer cards.
Slow Performance/Long Load Times:
- Check the card’s speed rating. If it’s lower than U3, V30, performance may suffer.
- Ensure the card isn’t full. The Switch experiences slowdown when the card’s storage is above 90% capacity. Keep at least 10GB free.
- Verify the card isn’t counterfeit. Real cards from SanDisk/Samsung perform consistently: fakes vary wildly and often stutter.
Corrupted Data Error:
- Power off immediately. Don’t force restart or remove the card suddenly.
- When powering back on, the Switch may offer to repair the corrupted data. Let it try.
- If that fails, remove the card and reformat it on the console (Data Management > microSD Card > Format). This erases the card but restores functionality.
- If corruption persists, the card may be failing. Back up what you can and replace it.
File Read Errors During Gaming:
- Usually indicates a connection issue or card degradation. Try removing and reinserting the card firmly.
- Clean the card’s gold contacts with a dry cloth if they look dusty.
- Check System Settings for available storage. If the card is full, delete some games and try again.
Switch Doesn’t Detect Newer Cards:
- Older Switch firmware (pre-2020) sometimes struggled with cards larger than 512GB. Update to the latest system software. Nintendo fixed this, but if you’re running ancient firmware, update first.
Most issues are installation or user error. Actual card failure is rare with quality brands, but counterfeits fail constantly. If a card acts up, the first step is verifying you didn’t buy a knockoff.
Maximizing Your Storage: Tips and Tricks
Once you’ve got the card installed, managing your storage efficiently extends how long you can go before buying a larger card.
Managing Game Libraries Efficiently
Here’s the mindset shift: having 500GB of storage doesn’t mean you should download 40 games. Be deliberate about what you keep installed.
Categorize Your Games:
- Always-Installed: Your current favorites, rotation games you play regularly. These stay.
- Seasonal/Event-Based: Games you play when new content drops or seasonally. Archive these between play windows.
- Completed Games: Story-driven games you’ve beaten. You might replay them someday, but they don’t need to be immediately accessible.
- Try-Later: Games you grabbed on sale but haven’t touched. These are the first candidates for deletion to free space.
Smart Deletion Strategy:
Nintendo Switch save data is separate from the game itself. Deleting a game doesn’t delete your save. You can reinstall the game later and pick up where you left off. This fundamentally changes storage strategy, don’t feel locked into keeping a game installed “just in case.”
Delete and reinstall games liberally. Yes, it requires re-downloading, but games reinstall faster than you’d expect (assuming decent internet). A 10GB game downloads in 20-30 minutes on typical home broadband. Compare that to the convenience of having space for new releases.
Organization Tips:
- Use game folders to organize by genre or play style. Create a “Rotation Games” folder for multiplayer titles and a “Story Games” folder for single-player adventures.
- Pin your current favorites to the Home menu so they’re immediately accessible. No digging through menus.
- Sort your games library by size (Data Management > microSD Card > Software). Knowing which games consume the most space helps you prioritize what to keep.
Pre-Load Consideration:
Major releases sometimes offer pre-load periods. Download the game a week before launch so you’re ready to play at midnight. But don’t feel obligated to keep games installed you’re done with. The hype dies after a week anyway.
Backing Up Your Data
Switches have cloud backup for save data, but there’s more to backing up than just saves.
Cloud Saves:
- Available if you have a Nintendo Switch Online subscription.
- Go to System Settings > Data Management > Save Data Cloud Backup.
- Automatically backs up your save data for most games. Some games (certain online titles) don’t support cloud backup due to anti-cheat concerns, but the vast majority do.
- You’re not actually limited to one Switch. Cloud saves sync across any console you’re logged into. This is clutch if you own multiple Switches or travel with a portable and dock at home.
Backing Up Full Data to Micro SD Card:
- This is different from cloud saves. You’re physically backing up the entire game + save data to the card itself.
- Data Management > microSD Card > Copy to Console or Copy to microSD Card.
- Takes time for large libraries, but it means you have a physical copy of everything.
- If your Switch ever dies or gets stolen, you can restore everything to a new console via the transfer process.
Computer Backups:
- Not officially supported by Nintendo. The Switch doesn’t just plug into a computer like a typical device.
- If you want to back up saves to a PC, you need a save editor tool, which exists in homebrew communities but isn’t endorsed by Nintendo.
- This is unnecessary if you’re using cloud saves. Cloud backup is honestly sufficient for casual players.
When to Backup:
- Before any major system update.
- If you’ve sunk 50+ hours into a game without backing up, do it. Once.
- Before trading in or selling your Switch, back everything up and transfer it to a new console if you’re upgrading.
For most users, Nintendo Switch Online’s cloud saves are enough. It’s automatic, it’s free (included with the subscription), and it covers the worst-case scenario, your Switch breaking and needing to restore on a new one. The game files themselves are just re-downloadable: the saves are the precious data.
When to Upgrade to a Larger Card
You’ll eventually outgrow your micro SD card. Here’s how to know when it’s time and how to upgrade smoothly.
Signs You Need More Storage
You’re Constantly Deleting Games:
If you find yourself uninstalling games more than once a week to make room for new ones, upgrade. Your card is too small for your usage pattern. A bigger card costs $30-50 and eliminates this friction permanently.
The Card is Always 85%+ Full:
The Switch experiences slowdown when approaching storage limits. Games load slightly slower, menu navigation stutters occasionally, and the console feels generally sluggish. This is your sign to upgrade.
You’re Missing Out on Sales:
Saw a great deal on a game you wanted but couldn’t buy because you have no space? That’s a cost of running a too-small card. Upgrade so you can grab deals without stress.
You’ve Bought More Games Than Your Card Holds:
Self-explanatory. If your library (physical + digital) exceeds what your card can hold, time to expand.
Games Are Getting Larger:
New Switch ports released in 2026 are trending toward 12-15GB installations as developers get more ambitious. Older games sat at 6-8GB. Your old 256GB card that used to hold 30 games might now only fit 20. Plan ahead.
Upgrading from 256GB to 512GB is common. Upgrading from 512GB to 1TB is less common but makes sense if you want zero worries for the next five years. After that, you’re probably overthinking storage.
Migration and Data Transfer Options
Upgrading means transferring everything from your old card to the new one. It’s not complicated, but there are a few methods.
Method 1: Using the Nintendo Switch System (Easiest)
- Insert both micro SD cards (you’ll need an adapter to use both simultaneously on a computer, or do this via the Switch’s USB-C port with a card reader).
- This method is limited because the Switch has one slot. You can’t insert both cards at once into the console itself.
- Instead, use the System Settings > Data Management > microSD Card Management > Copy to Console, then swap cards.
Method 2: Computer Transfer (Fastest for Large Libraries)
- Remove both cards from your Switch.
- Use a USB card reader on your computer to access both cards.
- Copy all files from the old card to the new card. Just drag and drop. This preserves everything, games, saves, system files.
- Insert the new card into your Switch. The console recognizes it with all your data intact.
- This method is faster than using the Switch’s built-in transfer tools because computer file transfer speeds exceed USB 3.0 speeds (which the Switch connects at).
Method 3: Re-Download Everything (Time-Intensive)
- Format the new card on your Switch.
- Go to your game library and re-download everything. Your save data syncs via cloud, so you don’t lose progress.
- Takes hours for a large library but is the “cleanest” method and sometimes fixes underlying file system issues.
Best Practice Recommendation:
For most players, Method 2 (computer transfer) is fastest and safest. Download a file explorer, connect both cards via USB reader, copy files. Done in 10-20 minutes depending on library size.
If you’re uncomfortable with computers, Method 1 via the console works fine but is slower. Method 3 is only recommended if you’re experiencing persistent issues with the old card.
Pro Tip:
Before transferring, do a cloud backup of your saves (System Settings > Data Management > Save Data Cloud Backup). If anything goes wrong during transfer, you can always restore from cloud on the new card.
Data transfer between micro SD cards is straightforward. The Switch is good about recognizing transferred data, so don’t stress too much. The main risk is human error, make sure you’re copying from the old card to the new card, not the other way around.
Once transfer is complete, format your old card if you want to repurpose it for another device. Don’t just toss it: micro SD cards are still useful for cameras, Android phones, and other gadgets. A reformatted 256GB card from your old Switch can become your phone’s external storage.
Conclusion
A micro SD card isn’t a luxury for your Nintendo Switch in 2026, it’s as essential as a controller. The system’s 64GB internal storage becomes a joke the moment you commit to a meaningful game library, and playing digital titles without external storage forces you into constant deletion cycles that kill the experience.
The good news: picking the right card is simple. A quality V30-rated card from SanDisk, Samsung, or Kingston in 512GB capacity costs $45-55 and solves your storage problems for years. Installation takes 30 seconds, and management becomes second nature once you accept that you don’t need to keep every game downloaded simultaneously.
Start with 512GB unless you know you’ll go heavier. You can always upgrade later, and the transfer process is painless. Avoid cutting corners with unknown brands, save data corruption isn’t worth saving $10. And if you’re still on the fence about capacity, remember that how you free up space on your Switch matters less when you have actual storage to work with.
Get a card, install it, and stop worrying about storage forever. Your Switch library, and your sanity, will thank you.